You’ve probably seen the odd tutorial for something like this, but this one is just a bit extra special.
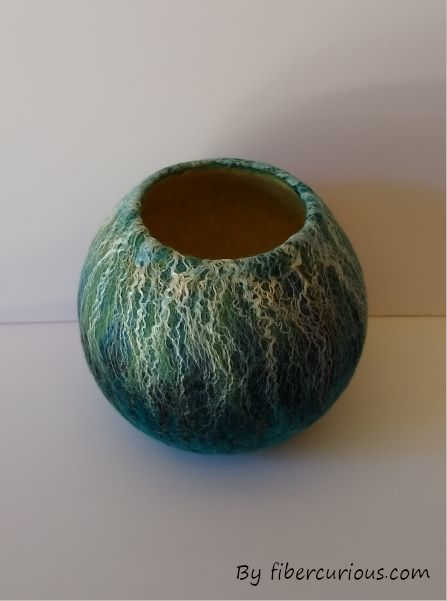
How amazing is the vessel above? I just love the colour combinations, the textures, and the quality of the vessel, it’s so even and thick! And you can follow along and make one of your own over at Fiber Curious!

This tutorial has great instruction, very thorough, and the pictures help you every step of the way. You can pick up some great new tips, who would have known you could use a toothpick that way? 🙂 Felting over something firm like a ball, rather than a balloon, seems like a much firmer option for me and you could have a ball that was any size you like!
I hope you enjoy the tutorial and pick up some useful advice for your next vessel creation!
The vessel featured in this project is truly a masterpiece, with its beautiful color combinations, textures, and overall quality. And the good news is, you can create your own stunning vessel by following the thorough instructions over at Fiber Curious.
This tutorial is packed with helpful tips and tricks, and the step-by-step pictures make it easy to follow along. You might even pick up a few new techniques, like using a toothpick in a unique way. And if you prefer a firmer option for felting, the tutorial suggests felting over a firm ball rather than a balloon, giving you the flexibility to create vessels in any size.
So, head on over to the tutorial and give it a try. You’re sure to learn something new and create a beautiful vessel that you can be proud of. Happy felting!
I saw a similar one done and she created two handles, for a nice rounded bowl style bag, was very nice.
As a passionate fiber artist, I love to experiment with different techniques and materials. One of my favorite methods of creating unique and functional fiber art is wet felting. Wet felting is a process where wool fibers are manipulated with water and agitation to create a dense, cohesive material. One of my favorite things to make with wet felting is bowls. Bowls are versatile and can be used for a variety of purposes, from holding jewelry to serving snacks. Through my experience, I have learned some tips and tricks for wet felting a bowl that I’d like to share with you.
Tip #1: Choose the right type of wool
For wet felting, it’s important to choose a wool that has a high crimp and is easily feltable. Merino wool is a popular choice, but you can also experiment with other breeds such as Corriedale or Romney. Be sure to avoid using superwash or pre-treated wool, as these will not felt properly.
Tip #2: Use a resist
To create a bowl shape, you’ll need to use a resist. A resist is a template that is placed between layers of wool to prevent them from felting together. You can use a variety of materials for a resist, such as plastic wrap, bubble wrap, or even a ball of yarn.
Tip #3: Add texture and color
Wet felting allows for endless creative possibilities, so don’t be afraid to experiment with different colors and textures. You can add wool roving, yarn, or even silk fibers to create unique patterns and textures on your bowl.
Tip #4: Don’t skimp on the agitation
Agitation is the key to successful wet felting. You’ll need to agitate your bowl vigorously to ensure that the fibers fuse together properly. This can be done by rubbing, rolling, or using a felting tool such as a bamboo mat or a washboard.
Tip #5: Be patient
Wet felting is a time-consuming process, so be prepared to spend several hours working on your bowl. It’s important to take your time and not rush the process, as this can result in a poorly felted bowl. Once you’re finished, allow your bowl to dry completely before removing the resist.