Wet felting is one of those crafts that feels both ancient and endlessly creative. It’s where warm water, soap, and wool come together in a little bit of magic — turning soft fiber into a strong, textured fabric.
Whether you’re making a flower, scarf, bowl, or wall art, the process of wet felting is beautifully tactile and meditative. You can start small (hello, soap cover or coaster) or dive into big projects like nuno scarves or vessels. Here’s everything you need to know to get started — including supplies, felting methods, and expert tips to avoid common beginner mistakes.
What Is Wet Felting?
Wet felting is the process of binding wool fibers together using moisture, heat, and friction. Wool has tiny barbed scales along each strand, and when you agitate them with soap and water, they interlock tightly.
Unlike needle felting (which uses barbed needles to sculpt dry wool), wet felting produces dense, smooth sheets or shapes of fabric. Think scarves, slippers, bags, bowls, or felt art panels.
What You’ll Need for Wet Felting
You don’t need expensive gear — most felters start with just soap, water, and patience. Here’s your essentials list:
- Wool roving or batts: Merino is the most popular for beginners because it felts quickly and smoothly.
- Warm water: Not boiling — just comfortably hot.
- Soap: A mild soap like olive oil soap or dish soap helps the wool fibers open up and bind.
- Bubble wrap or bamboo mat: Provides the friction surface you’ll roll your project on.
- Tulle or netting: Keeps fine fibers in place while you work.
- Towel and spray bottle: For soaking and managing water levels.
- Pool noodle or dowel: Used to roll your project.
- Optional: A hand sander or palm massager wrapped in plastic for fast felting.
Understanding Wool – The Heart of Wet Felting
Choosing the right wool can make or break your project.
- Merino (19–23 microns): Soft and smooth – great for scarves, wearables, and beginner projects.
- Corriedale or Shetland: Slightly coarser – excellent for bowls, bags, and textured art.
- Prefelt sheets: Semi-felted wool fabric you can cut and layer for clean shapes.
- Silk fibers, yarns, and fabric: Add shimmer and structure when creating nuno felt.
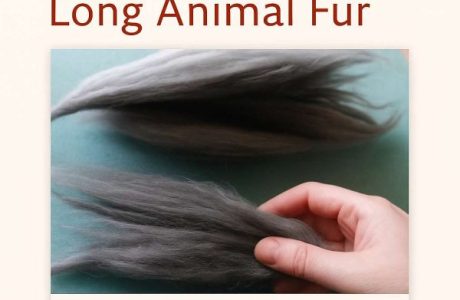
Pro Tip: Stick with 100% natural animal fibers. Synthetic or superwash wool won’t felt properly — they’ve been chemically treated to resist shrinking.
The Basic Wet Felting Process (Step-by-Step)
1. Lay Out the Wool
Spread bubble wrap bumpy-side up. Pull small tufts of wool (never cut!) and lay them in overlapping rows. Alternate directions with each layer — horizontal, then vertical.
For most projects, 2–3 layers is plenty.
2. Add Warm Soapy Water
Use a spray bottle or sponge to evenly dampen your wool. It should be wet but not swimming. Cover with a sheet of tulle or netting and press gently so the fibers settle together.
3. Start Rubbing
Use your hands or a small piece of plastic to gently rub the surface in small circles. The heat, soap, and motion will start tangling the fibers. Keep checking under the tulle to make sure it’s not shifting.
4. Roll and Full
Once the fibers start to hold together (called prefelt), roll your work around a pool noodle or dowel. Roll firmly 200 times in each direction, unrolling to check and rewet. This builds density and structure.
5. Shock and Shape
Rinse in hot and cold water alternately — the sudden temperature changes cause the wool to contract and lock even tighter. Shape your felt while it’s still damp, then air dry flat.
Wet Felting Techniques You’ll Want to Try
- Flat Felting: Perfect for scarves, wall hangings, or sheets of fabric.
- Nuno Felting: Felting wool onto silk or gauze fabric for a light, drapey texture.
- Resist Felting: Creating 3D shapes (like bowls or slippers) using a plastic template that prevents layers from joining until the resist is removed.
- Layered Design Felting: Adding decorative patterns, fibers, and yarns before the final felting stage for dimension.
Common Mistakes Beginners Make (and How to Fix Them)
- The wool won’t felt properly.
? Check that you’re using 100% non-superwash wool. Add a bit more soap and friction. - Edges are thin or wispy.
? Add extra wool around the borders before fulling. - Colors are muddy.
? Lay down contrasting colors carefully; avoid over-rubbing early on. - The piece shrinks too much.
? Remember to start 25–30% larger than your desired finished size. - It looks uneven.
? Spend more time in the prefelt stage — consistency is key before fulling.
Creative Wet Felting Ideas
- Felted wool soap bars (great for gifts)
- Wet felted flowers and brooches
- Poinsettia and poppy scarves
- Wool bowls and vessels using balloon molds
- Nuno-felted silk wraps
- Wet felted wall art landscapes
Each of these projects starts with the same core process — once you’ve mastered the feel of the wool tightening under your hands, you can create almost anything.
Wet Felting FAQ
How long does wet felting take?
Most small projects take 60–90 minutes. Larger scarves or vessels may take 2–3 hours.
Can you wet felt in the washing machine?
Yes — for prefelts or shrinking old wool sweaters. But for controlled results and detail, hand felting gives you far better precision.
What’s the difference between wet felting and needle felting?
Wet felting uses water and friction to bind fibers. Needle felting sculpts dry wool with special barbed needles. They complement each other beautifully — you can needle felt details onto a wet-felted base.
Can I use alpaca or mohair?
You can blend them with wool, but they don’t felt as strongly on their own because their fibers are smoother.
Why Felting Is So Addictive
There’s something deeply satisfying about watching wool transform in your hands — from soft fluff to firm, beautiful fabric. It’s creative therapy at its best: mindful, messy, and endlessly variable. Once you make one successful felted piece, you’ll start seeing possibilities everywhere — a wool bowl here, a flower brooch there, a textured wall hanging next weekend.