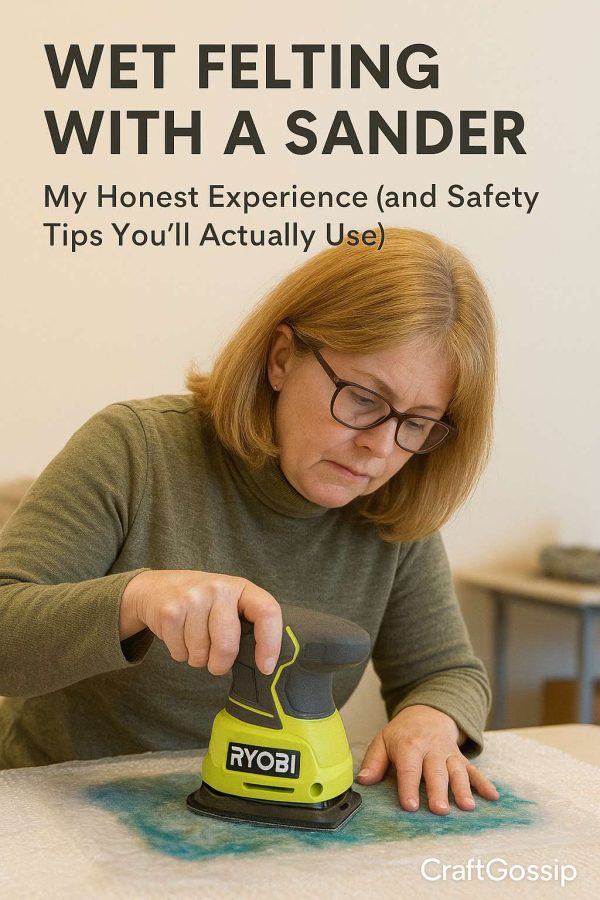
If you’ve been felting for a while, you’ve probably wondered: Can I really use a hand-held sander to speed things up?
Yes — and it’s every bit as satisfying as it sounds, if you do it safely.
I’ll be honest, the first time I tried this method, my family thought I’d completely lost it. There I was in the laundry, wool laid out on bubble wrap, extension cord snaking across the floor, goggles on — the full mad-scientist look. But after one go, I was hooked. This technique can cut your felting time in half and give beautifully even results once you get the hang of it.
Why Use a Sander for Wet Felting?
Traditional wet felting can be a serious arm workout. Rolling, pressing, rubbing — it’s therapeutic but also slow.
A hand sander takes the “elbow grease” part out of the equation and replaces it with a gentle vibration that helps mesh the wool fibres together faster and more evenly.
Here’s what happens:
- The vibration mimics the friction your hands would normally create.
- The heat from the sander’s motion encourages the wool scales to bind.
- Because the movement is consistent, you get more controlled, uniform felting, especially useful for flat projects like felt sheets, vessels, or large panels.
What You’ll Need
- Electric hand sander (a basic orbital or palm sander works best — no sandpaper attached!)
- Plastic bag or cling film (to protect the sander from moisture)
- Bubble wrap or bamboo mat
- Hot soapy water
- Wool fibres for your project
- Towel and spray bottle for adjusting moisture
Step-by-Step: How I Do It
- Lay Out the Wool Layers
Arrange your wool as you normally would for wet felting — in thin, even layers on your bubble wrap or mat. - Wet It Down
Add hot soapy water and gently press to ensure the fibres are damp but not swimming. - Cover It
Place a layer of plastic film or thin mesh over your wool to stop fibres from sticking to the sander. - Wrap Your Sander
Slip your sander inside a plastic bag (I use a ziplock). Make sure the cord stays dry! - Start Gently
Turn the sander on at a low speed and glide it slowly across the surface. The vibration should be even — not aggressive. - Work in Sections
Spend about 30–60 seconds per area, rewetting as needed. You’ll notice the surface tightening and the texture changing. - Flip and Repeat
Once it holds together, flip the piece and sand the back. - Finish by Hand
After the fibres start to felt, finish rolling or rubbing by hand for final shaping.
Safety First (Seriously, Don’t Skip This)
Electricity and water don’t play nicely together — so please:
- Always wrap your sander in plastic and check for leaks.
- Keep cords and sockets well away from your wet workspace.
- Use a ground fault circuit interrupter (GFCI) plug if possible.
- Never sand near standing water.
When It’s Worth It — and When It’s Not
This method shines for flat felting projects, prefelts, or large decorative pieces where you want smooth, even shrinkage.
However, I don’t recommend it for small 3D forms or delicate surface embellishments — the vibration can shift fibres too much.
If you’re creating scarves, wall panels, or felt fabric for cutting, the sander method is a total time-saver. But if you’re sculpting or making vessels, stick to hand rolling for more control.
Once you try it, you’ll never look at your power tools the same way again. My little palm sander now lives right next to my felting mat — and yes, my husband knows better than to borrow it for the shed.
If you love experimenting, this technique is a brilliant way to combine modern tools with traditional craft. Just be patient the first few tries — it’s a learning curve worth mastering.




Leave a Reply