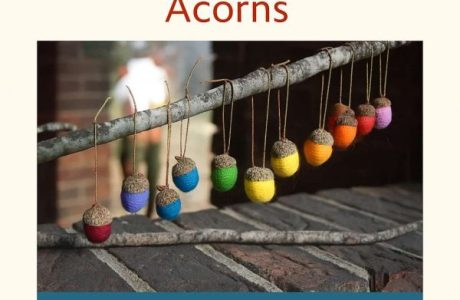
The Indian corn and squash and gourds are such a clever idea and I think I would try using wool yarn and felt them. These fun fall decorations were designed and crocheted by chiwaluv and you can get her patterns on “crochet me”.
Thanks chiwaluv for sharing your talents with us. chiwaluv is an Amigurumi artist, loving all things cute, and kawaii. She enjoys writing and publishing crochet and knitted amigurumi toy patterns, her creations are inspired from cute things around her, and are developed one stitch at a time! You may also visit her at her Web site or blog, where she sells patterns and does custom orders for those who don’t have time to crochet or knit, or don’t know how.
updated– These blogs posts are back from 2010 and are no longer valid. We didn’t want you to miss out on the patterns though, so we have created and shared these Free Indian Corn Patterns for fall here.
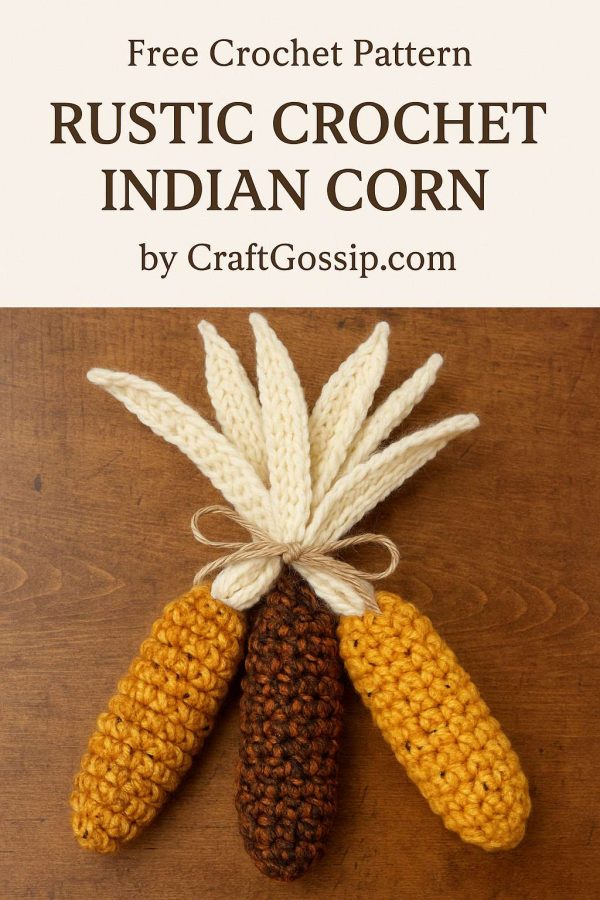
Crochet Indian Corn – Free Pattern
If you’re looking for a cozy fall project that’s both satisfying and stash-busting, these little crochet Indian corn decorations are absolutely perfect. Each ear is full of texture and color, and no two need to look the same. You can make a basketful in an evening — think mantle displays, Thanksgiving centerpieces, or even tied together as a door swag.
What I love most about this pattern is its flexibility. You can mix and match leftover yarns in warm golds, browns, oranges, and creams to mimic the natural beauty of real Indian corn. The texture really pops when you combine smooth and nubby yarns, like pairing a standard worsted with a strand of Lion Brand Homespun. Don’t worry if the yarn feels tricky at first — the end result is totally worth it!
What You’ll Need
- Crochet hooks: Size G and J
- A variety of yarns in autumn tones (including off-white for the husks)
- Tapestry needle
- Fiberfill stuffing
Notes Before You Start
- Choose your hook size depending on yarn thickness — the chunkier your yarn combo, the larger the hook.
- For each cob, hold two strands of yarn together. For thicker, more textured versions, try combining a smooth worsted weight yarn with something bulky like Homespun and use the J hook.
- Stuff as you crochet — it’s much easier than trying to do it at the end!
- To create the speckled look of traditional Indian corn, occasionally work a single black stitch randomly in your rows, carrying the black yarn through the inside of your work.
Corn Cob
- Using a G or J hook, ch 2, work 4 sc into the second ch from hook (use 5 sc if working with a thicker yarn combination).
- Ch 1, then work sc around for 2 rounds (do not join rounds from here onward).
- Make 1 increase and then sc for 2 rounds.
- Repeat this sequence two more times.
- Work 3 rounds even in sc.
- Decrease once and sc for 1 round.
- Decrease once again and sc for 2 more rounds.
- Join, finish off, and tuck the end inside.
Corn Husk
- With off-white yarn and a G hook, ch 18 and slip stitch back down the chain.
- Ch 15 and repeat — always slip stitch into the same starting point.
- Repeat this process until you have 7 separate slip-stitched “leaves.”
- Finish off, leaving an 8-inch tail for sewing.
Assembly
- Insert the husk piece into the open end of your corn cob.
- Use the tail to sew the husk to the inside of the cob, keeping stitches invisible from the outside.
- Shape and fluff the husk strands with your fingers.
Finishing Touches
Bundle your finished corns in groups of 2–3 and tie them together with twine or jute cord for a farmhouse look. You can also loop a few onto a garland or wreath for instant harvest charm.
These crochet Indian corns are a delightful way to use up yarn scraps — and they make your home feel instantly ready for fall!
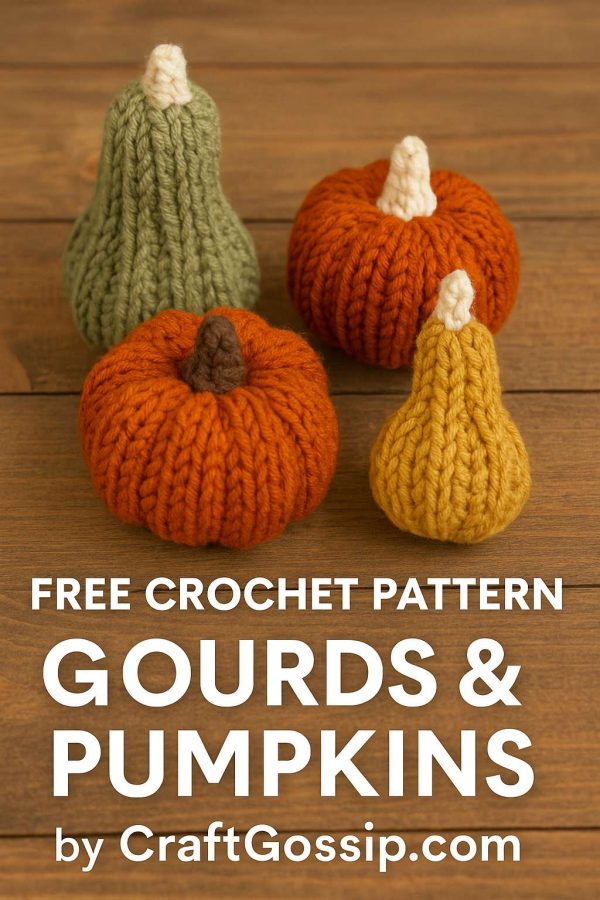
Gourds and Pumpkins
You’ll Need
- Worsted weight yarn in assorted fall tones (orange, cream, mustard, green, brown)
- Crochet hooks: G/4.0 mm and H/5.0 mm
- Tapestry needle
- Fiberfill stuffing
Note: Leave long yarn tails at both the beginning and end of each panel. You’ll use these to sew and gather your gourd or pumpkin later.
Stems
Small Stem (for mini pumpkins and gourds)
- Ch 5
- Row 1: Hdc in 2nd ch from hook and next 3 ch. (4 sts)
- Fasten off and leave tails to tuck in later.
Large Stem (for larger pumpkins)
Worked in continuous rounds.
- R1: 6 sc in magic ring (or ch 2, 6 sc in 2nd ch from hook). (6)
- R2–R5: Sc in each st around. (6)
- Fasten off, lightly stuff, and leave open at the bottom.
Small Crochet Gourd
- Ch 26
- Row 1: Sc in 2nd ch from hook, sc in next 2 ch, hdc in next 11 ch, sc in last 11 ch. (25)
- Row 2: Ch 1, turn. Sc in first 10 sts, hdc in next 11 sts, sc in last 4 sts. (25)
- Row 3: Ch 1, turn. Sc in first 3 sts, hdc in next 11 sts, sc in last 11 sts. (25)
- Repeat Rows 2–3 until you have 28 rows total.
- Fasten off, leaving an 18″ tail for sewing.
Mini Crochet Gourd
- Ch 17
- Row 1: Sc in 2nd ch from hook, sc in next ch, hdc in next 7 ch, sc in last 7 ch. (16)
- Row 2: Ch 1, turn. Sc in first 7 sts, hdc in next 6 sts, sc in last 3 sts. (16)
- Row 3: Ch 1, turn. Sc in first 2 sts, hdc in next 7 sts, sc in last 7 sts. (16)
- Repeat Rows 2–3 for 18 rows total.
- Fasten off, leaving a long tail.
Small Crochet Pumpkin
- Ch 24
- Row 1: Sc in 2nd ch from hook, sc in next 2 ch, hdc in next 15 ch, sc in last 5 ch. (23)
- Row 2: Ch 1, turn. Work BLO sc in first 3 sts, BLO hdc in next 15 sts, BLO sc in last 5 sts. (23)
- Repeat Row 2 until you have 38 rows total.
- Fasten off, leaving an 18″ tail.
Mini Crochet Pumpkin
- Ch 16
- Row 1: Sc in 2nd ch from hook, sc in next ch, hdc in next 10 ch, sc in last 3 ch. (15)
- Row 2: Ch 1, turn. BLO sc in first 2 sts, BLO hdc in next 10 sts, BLO sc in last 3 sts. (15)
- Repeat Row 2 until you have 26 rows total.
- Fasten off, leaving an 18″ tail.
Assembly for Gourds & Pumpkins
- With your starting tail, sew a gathering stitch along one short edge and pull tight to close the bottom.
- Sew up the long side using a whip stitch.
- Turn right-side out and stuff firmly (more at the base, less at the top).
- With the top tail, sew a gathering stitch around the open end, insert your stem, pull tight, and knot securely.
- Hide ends by threading them through the center and clipping the excess.
Optional:
- For a cinched pumpkin, thread yarn from top to bottom through the center and pull tight.
- For a segmented pumpkin, wrap yarn around the sides 6 times and tighten to form ridges.
Finishing Touch
Arrange your mini harvest on a mantel, scatter them across your Thanksgiving table, or string them onto a rustic twine garland. They make adorable gift toppers, too!
These Crochet Gourds and Pumpkins by CraftGossip.com bring a touch of handmade warmth to your autumn décor — one cozy stitch at a time.