You’ve spent hours stabbing away, your wool creature looks adorable… and then it starts falling apart. The head wobbles, the limbs sag, or worse — the surface starts peeling like a bad sunburn.
If that sounds familiar, you’re not alone. Every felter — beginner or seasoned — has faced the heartbreak of a project that just won’t hold together. The good news? It’s not your fault. You just need to understand what your wool’s trying to tell you.
So, grab your needle (and maybe that half-finished sheep you’ve been avoiding), and let’s figure out why your needle felting projects keep falling apart — and how to fix them once and for all.
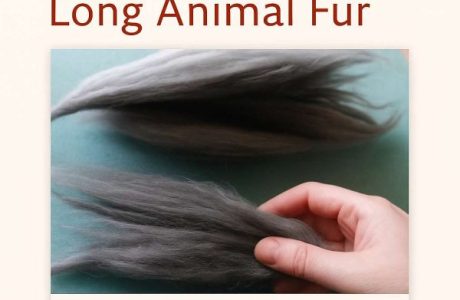
1. You’re Using the Wrong Kind of Wool
This one’s sneaky because it’s not obvious until it’s too late.
Not all wool fibers felt the same. Some are too fine, too slick, or even treated to resist felting (like superwash wool). If your project never firms up, it might not be your technique — it might just be the wrong fiber.
Look out for:
- Fibers that stay fluffy no matter how much you stab.
- Wool that feels slippery or shiny (like Merino top).
Fix it:
Use wool prepared for felting, not spinning or stuffing.
Great beginner-friendly breeds include Corriedale, Romney, Shetland, and Finnish wool — they have more “grip” and hold form beautifully.
2. You’re Not Felting Deep Enough
If you’re only poking the surface, you’re basically fluffing your wool — not felting it.
The needle needs to reach deep into the fibers to lock them together. A few light pokes on top will only compress the outer layer, leaving the core loose and unstable.
Fix it:
Use longer, deliberate stabs that reach into the center of your shape. Keep turning your piece as you go — that’s how you get a firm, even form.
Pro Tip:
Your piece should feel springy, like a dense sponge — not soft like cotton candy.
3. You’re Felting Too Fast
Speed stabbing looks satisfying, but it’s a one-way ticket to soft, uneven felt.
When you rush, you poke in random directions, and the fibers don’t get evenly compacted. You’ll end up with a project that looks firm but falls apart when handled.
Fix it:
Slow, steady stabbing wins the race. Alternate angles, rotate your piece, and focus on shaping evenly. Felting is like sculpting — think finesse, not fury.
4. You’re Adding Too Much Wool at Once
It’s tempting to grab a big handful of wool to “save time,” but that’s a rookie mistake.
Thick layers won’t felt evenly — the inside stays loose, while the outside felts into a crusty shell. Eventually, that shell cracks or separates from the inside.
Fix it:
Build up your shapes gradually. Add thin layers and felt each one firmly before adding more. You’ll get stronger, smoother results — and no mystery cracks later.
5. You Didn’t Felt Enough (Sorry!)
You know that point where your piece looks done? Yeah, it probably needs another 20 minutes.
Half-felted pieces lose their shape fast. You can spot them by their fuzzy surfaces and wobbly parts that shift when you squeeze them.
Fix it:
Keep felting until your project feels firm and resilient. If you press it gently and it springs back, it’s ready.
Test it:
Try to bend an arm or ear — if it flops, it’s not done.
6. You’re Mixing Wool Types Incorrectly
Mixing fiber types can look beautiful, but not all wools shrink or felt at the same rate. That’s how you end up with cracked seams or fluffy spots that refuse to stay attached.
Fix it:
Stick to the same wool breed for the base. If you want texture or color variation, add small amounts of finer fiber (like Merino) near the end, once your shape is firm.
7. You’re Not Finishing Properly
Even well-felted pieces can loosen over time if not finished right.
Fix it:
- Use a finer needle (like a 40) to smooth and compact the surface.
- Rub your finished piece gently between your hands to slightly warm and bind fibers.
- For small areas (like faces or paws), use a touch of steam to set the shape permanently.
Bonus: If your piece has weak joints (like heads or limbs), add a few thin strands of matching wool and felt across the join like a “wool bandage.” It’ll strengthen the connection invisibly.
8. Your Environment Might Be Working Against You
Yep, really. If your workspace is too humid or your hands are oily, your wool fibers won’t grip as easily.
Fix it:
- Wash your hands before working.
- Store wool in a dry container.
- If the air is very damp, run a small fan nearby while you felt.
9. You’re Expecting Perfection Too Soon
This one’s the emotional culprit.
Felting is a slow craft. It’s meant to be meditative — not instant. When you rush or give up too early, your piece simply doesn’t get the chance to firm up properly.
Fix it:
Work in short sessions and check your progress often. Felting’s all about time and touch — every poke brings your project to life.
If your needle-felted creations keep falling apart, it’s not a lack of talent — it’s just a few bad felting habits. Once you slow down, choose the right wool, and give your pieces enough attention, everything changes.
Your shapes will be smoother, your animals sturdier, and your confidence higher.
So next time your project starts to shed, sag, or split — don’t toss it. Grab your needle and redeem that wool!