If you’ve ever tried wet felting and fretted over thin spots or holes, here’s the project that sets you free. Cobweb felting wants those irregular, web-like holes. It celebrates imperfection — the thin patches, the wispy edges, the rawness that gives your fabric personality. Think of it as felting’s wild, artsy cousin.
This lightweight, lacy scarf is a joy to make. It’s soft, drapey, and visually stunning — a whisper of wool that feels luxurious but requires no advanced skills. The beauty of cobweb felting lies in how forgiving it is: if your layout isn’t perfect, it only adds more charm.
Why You’ll Love Cobweb Felting
Cobweb felting is perfect for scarf-making because it creates a thin, flexible, and breathable fabric. It’s the opposite of the dense, sturdy felt used for bags or slippers — this technique embraces holes, uneven thickness, and frayed edges.
You’ll love it if you:
- Enjoy organic, textural art pieces
- Want to experiment with fine wool or silk fibers
- Appreciate a project that’s meditative but not meticulous
- Prefer wearable art over perfection
It’s also wonderfully quick to felt — less rolling, less scrubbing, and a truly rewarding transformation when the texture appears.
Materials You’ll Need
Felting Tools
- Bubble wrap or solar pool cover (at least 3 m long)
- Pool noodle (8 cm diameter)
- Liquid soap (I love Murphy’s Oil Soap, but dish soap works fine)
- Warm water in a sprinkler or ball brauser (you can DIY one with a recycled bottle)
- Large bowl or pail (holds about 4 L)
- Mesh/tulle netting or gauze (use in sections if needed)
- Plastic shopping bag (perfect for rubbing and distributing water)
- Towels and sponge for cleanup
- Optional: Knee pads (trust me, your knees will thank you)
Felting Fibers
- 2.3 oz (65 g) of Merino roving in your main color (I used lilac and purple)
- A few wisps of Mulberry silk for shimmer (optional but lovely)
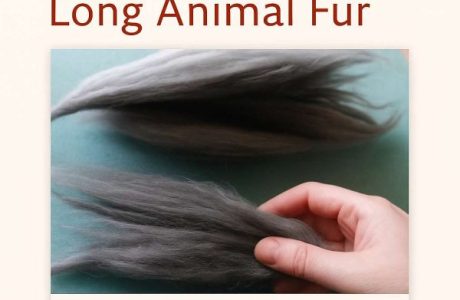
- Curly wool locks for a soft, whimsical fringe
Finishing
- Conditioner for softness (any kind will do)
- Patience and a warm workspace
Setting the Scene
Felting days are best when the weather is calm, your playlist is mellow, and you’re not worried about splashing water everywhere. I usually spread towels across my kitchen floor or a folding table outdoors. It’s messy but satisfying — and when the sunlight hits the wet fibers, it feels almost magical watching them bond together.
Step-by-Step: Creating Your Cobweb Felted Scarf
Step 1 – Layout
Pull your roving apart gently and lay it out in long, airy strands. Think of spiderwebs drifting across your surface. Let the fibers overlap lightly, with thin spots and even little holes. Unevenness is the goal here — no need for perfect coverage.
Lay out your base so it measures about 2.5 m long and 50 cm wide (before shrinkage). It’ll shorten and tighten as you felt, ending around 1.2–1.3 m long.
Tip: Keep your edges light and feathery. Dense edges will roll in and lose that lovely cobweb look.
Step 2 – Add Texture and Color
Now’s the fun part — decorating!
Lay down curly locks at the ends for a soft fringe and scatter some down the middle for texture. Draft a few thin ribbons of your accent color (purple in my case) and wave them loosely across the surface.
For extra shimmer, pull wisps of silk top and let them catch the light randomly throughout the design. It’s like sprinkling highlights into a watercolor painting — subtle but transformative.
Step 3 – Wet Down and Cover
Cover your layout with mesh or tulle to keep fibers in place. Sprinkle warm, soapy water evenly across the wool. The goal is damp, not drowned. Use your hands or a scrunched plastic bag to spread the water through gently — no hard rubbing yet.
Roll your pool noodle over the top a few times to help the water penetrate the layers. Blot any excess with a towel or sponge.
Step 4 – Start Rubbing
Now remove the mesh and place a fresh piece of bubble wrap (bubbles up) or your pool cover over the wool. Add a few drops of soapy water on top so your hands glide easily.
Rub gently in circular motions for five minutes per section. You’ll start to feel the fibers clinging together. Keep everything slippery — dry rubbing can shift fibers or felt unevenly.
Step 5 – Make It Cobwebby
Here’s where cobweb felting becomes addictive.
Peel back your plastic and — with confidence — poke holes in the fabric. Widen thin spots with your fingers, and stretch the edges slightly so they look organic. The trick is variety: big, small, clustered, spaced-out — a random pattern looks most natural.
Re-cover the area, add a little soapy water, and rub again for 10–15 minutes per section to lock those holes in place.
Step 6 – Pinch Test & Warm Up
Lift a few thick areas between your fingers. If the fibers stick together when you pinch and pull, your felt is stable enough to roll. If not, keep rubbing another few minutes.
Re-wet the scarf with warm (not hot) soapy water. Warmth accelerates the felting reaction and helps fibers interlock.
Step 7 – Rolling the Scarf
Roll your scarf around the pool noodle and roll it back and forth about 200 times (roughly 10 minutes).
Unroll, check the edges and holes, and reopen any that look like they’re closing up. Pull gently to stretch the cobweb effect. Then roll it again for another 10 minutes.
By now, the fabric should be noticeably smaller, more stable, and delightfully web-like.
Step 8 – Fulling (Scrubbing Stage)
Time to build strength and texture.
Scrub the scarf gently against your bubble wrap or mat, either flat or bunched up in your hands. This is where the fibers compact and the fabric gains structure. Alternate between scrubbing and stretching to maintain that airy lace texture.
If your scarf cools down, soak it again in hotter soapy water — this speeds up fulling beautifully.
Step 9 – Rinse and Soften
When your scarf feels strong and cohesive (no loose fibers), rinse out the soap thoroughly with lukewarm water.
For extra softness, soak the scarf in a conditioner bath (1 tbsp conditioner + 1 cup water) for about 30 minutes. Rinse lightly and press out water in a towel — don’t wring hard.
Lay flat to dry, reshaping the holes and edges as needed. You can hang it, but be sure to straighten the locks so they dry nicely.
The Finished Scarf
Your cobweb felted scarf should now be soft, sheer, and gorgeously textured — light enough for summer, cozy enough for winter layering.
It’s one of those projects that looks far more complex than it is. Pair it with a simple white top to let the texture shine, or pin it with a shawl clasp for a statement look. Each piece turns out a little different, and that’s the beauty of it — no two cobweb scarves will ever be the same.
Troubleshooting & Tips
- Too many holes? No problem. Cobweb felt thrives on open structure.
- No holes at all? Spread fibers thinner next time — your scarf will still be soft and beautiful.
- Edges rolling in? Stretch them back while still damp.
- Felt too stiff? Add more conditioner soak time and massage the fabric while it dries.
Cobweb felting is part technique, part intuition. The more you relax into it, the more your fabric will reward you.
This project is wonderfully freeing — there’s no “wrong” way to cobweb felt. Each scarf becomes a fingerprint of your own creativity. You’ll likely finish one and immediately want to start another in a new color blend.
Try variations with ombré wool, silk inclusions, or even felted flower embellishments. You can scale the same technique into wraps, ponchos, or even sheer curtains. Once you fall in love with cobweb texture, you’ll see endless possibilities.