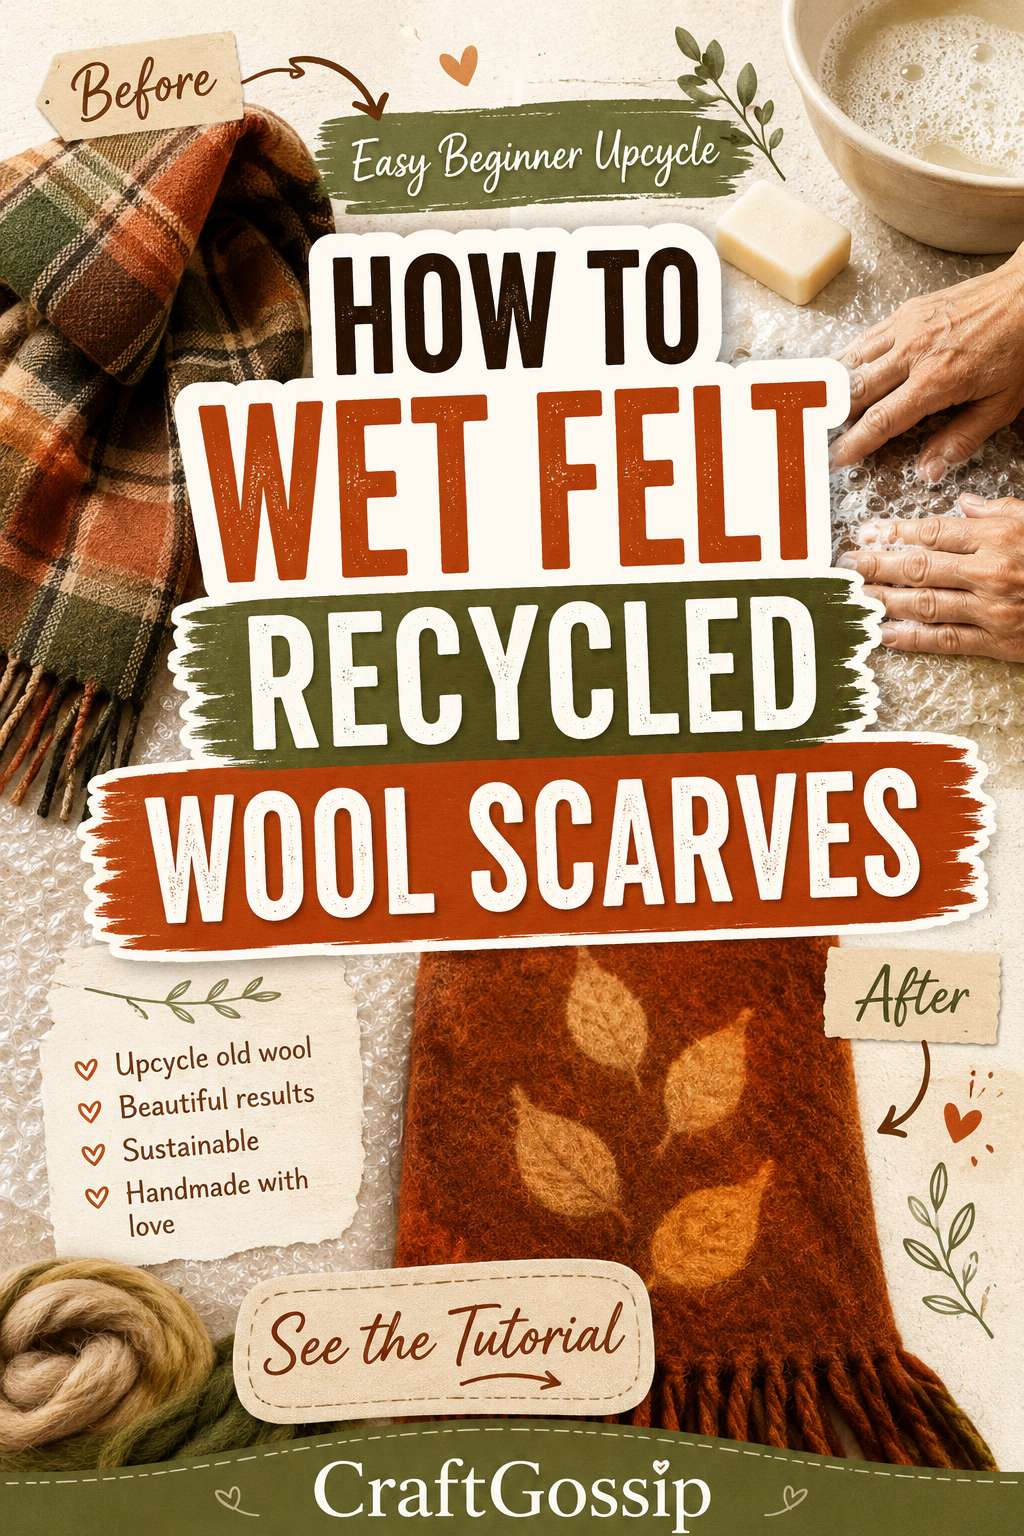
There’s something magical about breathing new life into old wool scarves. Maybe it’s that soft merino one with a tiny moth hole, or a thrift-store find that’s just a bit too itchy to wear — either way, they’re perfect for felting.
If you’ve ever wanted to try wet felting but thought you needed fancy equipment or piles of wool roving, think again. You can create stunning felted textures, accessories, and even art pieces using nothing more than recycled wool scarves, warm water, and a little soap.
This is real felting — hands-on, creative, and beautifully imperfect — and it’s one of the best ways to upcycle something you already have.
Why Use Recycled Wool Scarves for Felting?
Recycled wool scarves are already halfway felted — they’re woven or knitted, made of natural fibers, and soft enough to shrink and fuse under warm water and friction. That makes them ideal for beginners who want to experiment with texture and transformation without investing in new materials.
Bonus: Every scarf tells a story. Maybe it was your grandmother’s, or a flea-market treasure — when you felt it, you’re not just crafting; you’re preserving something in a new form.

What You’ll Need
You probably already have everything you need at home:
- A 100% wool scarf (check the label — avoid acrylic or polyester blends)
- Warm water (not boiling)
- A bar of mild soap or dishwashing liquid
- Bubble wrap or a bamboo mat (a clean towel works too)
- Plastic bag or cling wrap (for rolling)
- Old towel (for drying and cleanup)
Optional: bits of wool roving or yarn scraps if you want to add decorative layers.
Preparing Your Scarf
Before felting, wash your scarf gently in warm water to remove any oils or finishes that might prevent felting. Don’t use fabric softener — it actually stops the fibers from bonding.
If you want a more dramatic transformation, cut your scarf into panels or smaller sections. Thinner wool scarves will felt faster than chunky ones.
Step-by-Step: How to Felt Your Scarf by Hand
1. Set Up Your Workspace
Lay down a towel to protect your surface. Place bubble wrap (bubble side up) or a bamboo mat on top.
2. Wet the Wool
Lay your scarf flat and sprinkle or spray warm, soapy water over it. You want it damp but not dripping.
3. Add Friction
Using your hands, gently rub the surface in small circular motions. You’ll feel the fibers start to tighten. If you’re using a woven scarf, you might see the weave pattern soften and blur — that’s felting magic happening.
Tip: For more even results, roll your scarf inside the bubble wrap or towel, then roll it back and forth 50–100 times, unrolling and rotating it every few minutes.
4. Check the Progress
Unroll your scarf and inspect the texture. You’re looking for shrinkage, soft edges, and a slight fuzziness. If you want more firmness, continue rolling and rubbing.
Each scarf behaves differently depending on the wool type and weave — part of the fun is seeing how it evolves.
5. Rinse and Dry
Once you’re happy with the texture, rinse your felted scarf in cool water until the soap is gone. Press (don’t wring) to remove excess water, then roll it in a towel and lay flat to dry.
Creative Ways to Transform Your Felted Scarf
Once your scarf has been felted, the possibilities are endless. Here are some favorite ways to give it a second life:
- Cut into felt sheets for crafting – perfect for ornaments, appliqué, or small purses.
- Sew into a cozy clutch or zippered pouch.
- Turn into wrist cuffs or bookmarks by cutting narrow strips.
- Add embroidery or needle-felted designs to the newly textured surface.
- Create a wall hanging by layering felted panels together.
Each piece has its own texture and color pattern, so no two scarves ever felt the same way twice.
Troubleshooting Common Issues
Scarf not felting enough?
Some “wool” scarves are treated to resist shrinkage. Try using hotter water and rougher friction (rub between bubble wrap or against a bamboo mat).
Shrunk too much?
That’s normal! Turn it into something smaller — a patch, coaster, or felted bracelet.
Uneven texture?
Fold your scarf in half, re-wet, and roll again to even out the fibers.
Remember: imperfections add charm. A slightly uneven finish looks beautifully organic.
Why This Project Is Perfect for Beginners
- No expensive supplies needed.
- Uses recycled materials (great for eco-conscious crafters).
- Hands-on and meditative — you feel the wool change under your fingers.
- Every result is unique — your scarf becomes art, not just fabric.
This is slow crafting at its best — mindful, sustainable, and creative.
Bonus: Layering for Artistic Texture
If you want to take things up a notch, try laminating pieces of wool roving, silk fibers, or yarn onto your scarf before felting. As the fibers shrink together, they bond permanently — giving a painterly, nuno-felted texture without needing a silk base.
Use thin layers for delicate effects or thicker patches for bold contrast.
Wrap Up
Wet felting with recycled wool scarves is the perfect mix of art and sustainability. You’re reducing waste, saving money, and learning the fundamentals of felting — all while creating something gorgeous and deeply personal.
So next time you find an old wool scarf hiding in your winter drawer, don’t toss it — felt it. With warm water, soap, and a little patience, you’ll turn it into something even better than before.